Tuesday, June 17, 2014

Water Pump


In the back of the house, by the kitchen bay window, we now have a copper/brass water pump by the Durham company. I mixed watered down glue with sand, and leveled it out within a border of paperclay bricks to create the cement effect.

Friday, June 6, 2014

The Perfect Lawn


Many many years ago, I had bought two Woodland Scenics landscaping kits from Hobby Lobby. I finally dusted off the boxes and was surprised that the Scenic Cement (watered down glue) was still OK to use!

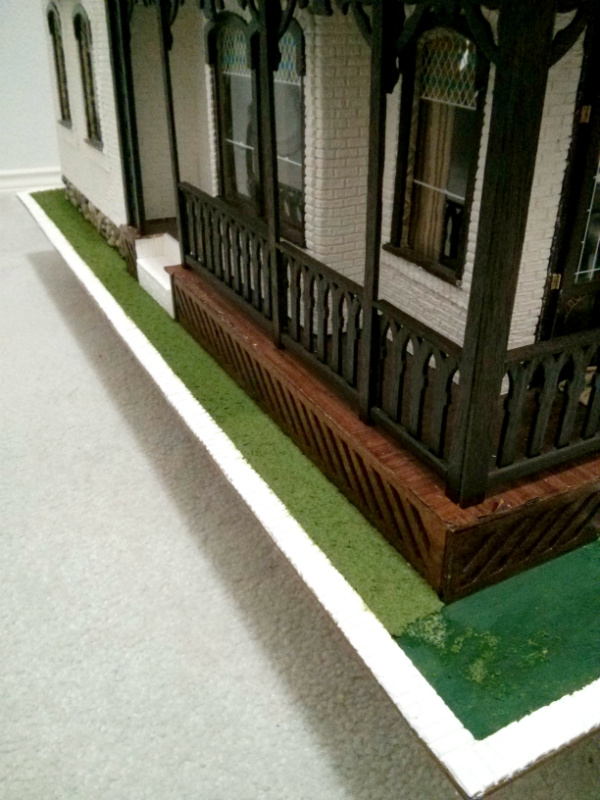
I found one medium pouch of "Green Blended Turf" and smaller pouches of "Burnt Grass Fine Turf," "Green Grass Fine Turf" and "Medium Green Coarse Turf," all of which I mixed together in a zip-lock bag to get enough material to flock the lawn.


At this time, I am adding a lawn around the house, but leaving the courtyard empty. I am still not sure what I want to do for the courtyard.

I painted the wooden base with a coat of sap green acrylic paint.


VoilĂ : grass!


You can use Scenic Cement to glue the grass on, or you can simply use watered down white glue. I have used both during my project, and got the same result.

If you are watering down glue, make sure it is not so watery that it will not hold down the grass after it dries. It will be the consistency of full-cream milk, and slightly slimy from the glue.


I poured the flocking material into a disposable bowl, and mixed it with the glue so it looked like avocado dip.

I took clumps of the mixture, and patted them down to create a thin layer of grass on the base.


I mixed small batches so that the mixture would not dry out while I worked, but the process went quite fast for me.

This is the first time that I ever flocked dollhouse lawn, and I was pleasantly surprised at how easy it was.

Monday, May 5, 2014

Bathroom Accessories


In January, I bought the Chrysnbon Bathroom Accessories kit from eBay at $5.85 (+ $1.69 shipping). I finally got the chance to paint some of them and add them to the bathroom.

You can see the soap holder and white soap in the bathtub, and the back scrub brush on the stool.

Beside the toilet, you can see the toilet paper holder and plunger. I also painted the hot water bottle a dull red, but since I don't have bathroom shelves yet, I didn't know where to put it.


I am still pondering if I should add the toothbrush holder and glass holder beside the sink. Since I need storage, I may have to add a shelf with a towel rack above the bath tub, instead of adding the simple towel rack that comes with the kit.

Friday, May 2, 2014

The Tower Room


The telescope has been set up in the tower room. Now we have to wait for nightfall ...


Monday, April 21, 2014

The Telescope


Bought the telescope to star-gaze from the tower room. The unfinished pewter telescope cost $5.99 (+$2.50 shipping) on eBay. I had fun painting it in coats of black, copper and gold acrylic paint.


Thursday, April 3, 2014

Brick Borders Complete

I have finished adding brick borders to the 30 windows! phew!
I especially like the borders around the tower windows and the oval windows.


Monday, March 10, 2014

Patching the Oval Window


During the bathroom remodeling project, I had closed off an oval window. As you can see, I had pasted a piece of paper on the inside before putting up the wallpaper.


Using the window frame as template, I cut out an oval piece of paper to paste on the outside wall. I used an old business card so that the paper would be heavier than regular paper.

I glued on a layer of paper clay, smoothed out the edges, textured the clay and finally sculpted the brick pattern on it. 


I sadly discovered that the number of rows of bricks on either side of the window did not match. You will notice it if you look closely at the top left corner of the newly covered oval shape in the photos above and below.

Of course, when I originally bricked around the window, I wasn't anticipating that one day I would have to close it up.

Once the paper clay dried, it also shrunk a little, causing cracks around the edges of the oval.


I patched the cracks with more paper clay, blending and applying texture as I go.


I also added a thin layer of clay to hide the mismatched brick layers. Once the clay was semi-dry, I sculpted brick shapes to match the surrounding area.

The end result is not perfect, but it will do.