Friday, November 30, 2007

Hello From the Constructions Site


The first floor front section is complete. I tested the chandeliers by sticking the ends of the wire in a small 3 Volt battery box. I was afraid that the connection might have broken or something, but at least these two are fine for now! I am putting in floor and ceiling molding to hide the edges. However, you might have seen that where the walls meet vertically, especially in the bay window area, there is a noticeable gap. I am hoping it will become less obvious when I seal the edges from outside. And finally, the curtains I put in will cover the edges anyway.

Wednesday, November 28, 2007

Windows & Walls


I love the frames! I wish I could afford the working windows, but ... Oh Well! A few of the inner walls (2nd and 3rd floor) are yet to be papered. I had bought 4 yards of fabric: just to be on the safe side. I bought upholstery-grade fabric, which was more expensive than regular cotton; but I was really looking for something with a slight sheen, and cotton was just not doing it!

Monday, November 12, 2007

Dry Fitting

The major walls are complete. Next step: wallpaper smaller walls and add interior trims; add wall sconces and power outlets; glue when everything is finalized.

A Setback Due To Botched Schematics!


I couldn't believe my eyes when I tried to dry fit the walls on Saturday! As soon as I reached step 2 of wall assembly, I hit a major snag. Apparently, the diagram of the left wall (on sheet 11) was labeled incorrectly. As a result, there was a strip of exposed slots right under the ceiling.

So I had to redo the first floor wallpaper as well as fix the bottom part of the second floor. Note to self: contact Greenleaf and ask them to make the changes on their diagrams!

Some valuable tips I learned from this quandary:

  1. Do not paste the entire fabric to the wall if possible. Glue only along edges, so that if and when you need to pull out the fabric, it is easier to remove.
  2. Dry fit the parts before wallpapering to make sure the schematics are correct.
  3. Buy extra fabric ~ because chances are, mistakes will happen!

Monday, October 29, 2007

The Floors Have Been Floored!

Finally, the floors are complete...almost! This includes wiring the ceiling lights as well as the faux wood tiles. Doesn't look like much, right? But consider this...I had to cut 1 in. square tiles out of the wood-textured Con-Tact paper, peel them and paste them in a perfect checker-board pattern. Total cost of finishing the floors is less than $15 ~ which is considerably less than what I would have to pay if I used actual wood veneers.

Sunday, October 7, 2007

Chandelier Connections


After planning out where the chandeliers would go, I took out my wood-burning tool and made holes through which the chandeliers would be threaded. I also traced shallow grooves on the floor, so that the wires would lay flat, and not create bumps when I add the mosaic.


On the opposite side, which is the ceiling for the level below, you can see the chandelier's hanging. I still haven't decided what color to paint the ceiling. That will depend on the wallpaper color.

Saturday, October 6, 2007

Electrifying!

As far as the dollhouse goes, I am in the process of putting in electrical connections. I found these helpful tips on http://www.dollshouse.com/flash/demonstration.html where there are flash demonstrations of how to electrify dollhouses by using either copper tapes or socket strips. I am using the "copper tape" method. My chandeliers have arrived: 6 as of now. They have been hung on the ceiling and the faux mosaic applied. I am still looking for good deals on wall sconces.

Friday, June 8, 2007

Floor

Finally the floor is finished! well...at least the first floor: 2 more levels to go! Don't worry about the black patch in the middle; that's where the staircase goes. The interior has a checkerboard pattern of oak and mahogany. The porch is done in dark wood planks.


One tip: instead of using real wood veneers, I used wood textured Con-Tact paper. That was considerably cheaper and lighter than wood, easier to cut and fit into tricky corners. Finally, the floor received a thick coat of Krylon Triple Thick Crystal Clear Glaze. That gave the floor a rich and glassy finish, and I can rest assured that the contact paper will not peel off.

Friday, June 1, 2007

The Oriental Staircase

I think I got a *little* carried away with the staircase decoration! The ruby rhinestones and hand-drawn gilded swirls create an air of opulence and grandeur that is fit for a nabob! Which is giving me an idea of how the master of this manor should be ...

He is a rich (and handsome, obviously) young man: an adventurer, a lover ~ in short, someone whose mere presence makes a girl swoon! He is ever restless ~ climbing mountaintops in Nepal one moment ... and in the next, hunting man-eating lions in Africa. And yet, there is the quieter side of him, that loves to read and explore ~ did I mention he takes a keen interest in archeology?

Wednesday, May 23, 2007

Upstairs & Downstairs

The stairs are done! After they were assembled, I painted them in dark chocolate and black acrylic paint. Finally, they got a thick coat of gloss varnish. I decided to close off the small storage closet under the stairs.


The stairs are far from being finished though! The house will have an Oriental decor, so the staircase needs to be dressed up considerably!

Wednesday, May 16, 2007

First Floor Base

Don't you just love it when the parts come together as they are supposed to? :) I had to trim some of the tabs a little bit so they fit in the slots better. The gaps can be filled in with wood filler later. I must admit, once I started assembling the kit, it seems less daunting. The next step is to assemble the staircase.

Wednesday, May 9, 2007

Laying the Foundation

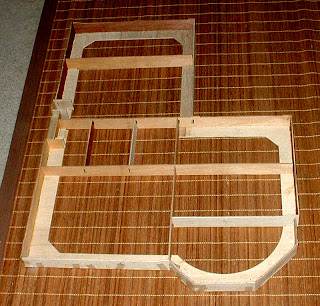
So, I finally made the plunge! Last night, I started on the Garfield Manor. Note to self: dollhouse instructions are not the easiest to decipher!